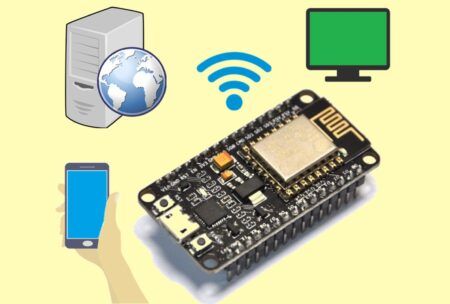
Learn how to build IoT web applications, LCD pattern, Physical Input, GPIO Interfacing, firmware Installation, ESP12E, NodeMCU and more. Read more.
Stepwise Learning is dedicated to creating a better learning experience for anyone who wants to explore the field of cutting-edge technologies. Our business idea supports this vision by offering a range of well-designed high-quality courses. Comfiny's minds are a team of committed developers involved in sharing knowledge and skills gained from various IT industries. We believe in exploring cutting-edge technologies down to its minute details and aim to cover multiple aspects of it to make
Access all courses in our library for only $9/month with All Access Pass
Get Started with All Access PassBuy Only This CourseAbout This Course
Who this course is for:
- Anyone who wants to develop a real time web application project to control AC appliances remotely
- Anyone who wants to step into the world of IoT with zero knowledge
- Anyone who wants to explore the field of Embedded Systems with the cheap and the best development board available in the market
- Anyone who is searching for the alternative of Arduino and wants to starts with on-board WIFI system on a chip
- The course is also meant for non technical guys who have zero knowledge of programming and wants to step into the world of Embedded Systems
What you’ll learn:
- Build your own IoT dashboard and control any home appliances remotely
- Get to know the principle of LCD and generate animated pattern of your choice
- Understand the fundamentals of LUA programming and powerful C++ language
- Detailed knowledge of various IDE for communicating with NodeMCU
- Build your own prototype with minimal expenses
Requirements:
- Basic knowledge of any programming language
Welcome to the course “ESP8266 For Absolute Beginner – Arduino Alternative” Before choosing any development board, you will look for three things. The first thing would be how easily you can connect the sensors and actuators. Secondly, for IoT project implementation, the device should be accessed and controlled remotely. And, finally, it should be portable, inexpensive and readily available.
Over the past few years, you might have heard about the popular boards such as Arduino, Raspberry Pi, Beagle bone black etc. These boards will fulfill all your requirements for your embedded systems project but are costly as well as bigger in size. The idea is to use a board which is tiny and can be embedded anywhere for rapid deployment.
In this course, I will cover in detail about NodeMCU and how to set it up step by step. After successful installation, you will learn how to flash the latest version of the firmware and get started. We will begin with Lua programming and complete two basic projects to understand the programming flow and the working process. Lua is a powerful and fast programming language that is easy to learn and use and to embed into your application. Lua is designed to be a lightweight embeddable scripting language.
Upon successful completion of the above project, I will also teach you how to configure and use NodeMCU with the most popular and widely used Arduino IDE and program it using C++. Using the Arduino IDE, we will code and complete two different projects. In the first project, you will learn how to make various patterns of animated graphics and execute it on the LCD.
In the second project, we will harness the power of NodeMCU by building a fully functional web server to remotely control AC appliances. We will not use any third-party app to access the web services; rather we will use web scripting language to code the webpage and the backend server.
I will also share the source code so that you can replicate the project by yourself.
Our Promise to You
By the end of this course, you will have learned to build your own IoT dashboard and control any home appliances remotely.
10 Day Money Back Guarantee. If you are unsatisfied for any reason, simply contact us and we’ll give you a full refund. No questions asked.
Get started today!
Course Curriculum
| Section 1 - Introduction | |||
| Introduction to NodeMCU | 00:00:00 | ||
| General Purpose Input/Output | 00:00:00 | ||
| Section 2 - Connection And User Interface | |||
| Understanding Putty And ESPlorer | 00:00:00 | ||
| Breadboard And Its Internal Structure | 00:00:00 | ||
| Section 3 - First Step To Physical Computing | |||
| Section 3 Files | 00:00:00 | ||
| Programming The LED | 00:00:00 | ||
| Real Time Demonstration – LED Blinking Duration Control | 00:00:00 | ||
| Section 4 - Reading Human Physical Input | |||
| Section 4 Files | 00:00:00 | ||
| Reading Physical Input From A Push Button | 00:00:00 | ||
| Understanding The Code – Physical Input | 00:00:00 | ||
| Real Time Demonstration – Physical Input | 00:00:00 | ||
| Section 5 - Arduino IDE And LCD Programming | |||
| Section 5 Files | 00:00:00 | ||
| Getting Started With Arduino IDE | 00:00:00 | ||
| Generating Animated Patterns On LCD | 00:00:00 | ||
| Programming The LCD | 00:00:00 | ||
| Real Time Demonstration – Pattern Generation On LCD | 00:00:00 | ||
| Section 6 - NodeMCU Web Server | |||
| Section 6 Files | 00:00:00 | ||
| Introduction To Web Server | 00:00:00 | ||
| Understanding The Web Server Code | 00:00:00 | ||
| Real Time Demonstration – Web Server In Action | 00:00:00 | ||
| Section 7 - Hardware Components And Quiz | |||
| Specific Links Of The Hardware Components | 00:00:00 | ||
| Hardware | 00:00:00 | ||
About This Course
Who this course is for:
- Anyone who wants to develop a real time web application project to control AC appliances remotely
- Anyone who wants to step into the world of IoT with zero knowledge
- Anyone who wants to explore the field of Embedded Systems with the cheap and the best development board available in the market
- Anyone who is searching for the alternative of Arduino and wants to starts with on-board WIFI system on a chip
- The course is also meant for non technical guys who have zero knowledge of programming and wants to step into the world of Embedded Systems
What you’ll learn:
- Build your own IoT dashboard and control any home appliances remotely
- Get to know the principle of LCD and generate animated pattern of your choice
- Understand the fundamentals of LUA programming and powerful C++ language
- Detailed knowledge of various IDE for communicating with NodeMCU
- Build your own prototype with minimal expenses
Requirements:
- Basic knowledge of any programming language
Welcome to the course “ESP8266 For Absolute Beginner – Arduino Alternative” Before choosing any development board, you will look for three things. The first thing would be how easily you can connect the sensors and actuators. Secondly, for IoT project implementation, the device should be accessed and controlled remotely. And, finally, it should be portable, inexpensive and readily available.
Over the past few years, you might have heard about the popular boards such as Arduino, Raspberry Pi, Beagle bone black etc. These boards will fulfill all your requirements for your embedded systems project but are costly as well as bigger in size. The idea is to use a board which is tiny and can be embedded anywhere for rapid deployment.
In this course, I will cover in detail about NodeMCU and how to set it up step by step. After successful installation, you will learn how to flash the latest version of the firmware and get started. We will begin with Lua programming and complete two basic projects to understand the programming flow and the working process. Lua is a powerful and fast programming language that is easy to learn and use and to embed into your application. Lua is designed to be a lightweight embeddable scripting language.
Upon successful completion of the above project, I will also teach you how to configure and use NodeMCU with the most popular and widely used Arduino IDE and program it using C++. Using the Arduino IDE, we will code and complete two different projects. In the first project, you will learn how to make various patterns of animated graphics and execute it on the LCD.
In the second project, we will harness the power of NodeMCU by building a fully functional web server to remotely control AC appliances. We will not use any third-party app to access the web services; rather we will use web scripting language to code the webpage and the backend server.
I will also share the source code so that you can replicate the project by yourself.
Our Promise to You
By the end of this course, you will have learned to build your own IoT dashboard and control any home appliances remotely.
10 Day Money Back Guarantee. If you are unsatisfied for any reason, simply contact us and we’ll give you a full refund. No questions asked.
Get started today!
Course Curriculum
| Section 1 - Introduction | |||
| Introduction to NodeMCU | 00:00:00 | ||
| General Purpose Input/Output | 00:00:00 | ||
| Section 2 - Connection And User Interface | |||
| Understanding Putty And ESPlorer | 00:00:00 | ||
| Breadboard And Its Internal Structure | 00:00:00 | ||
| Section 3 - First Step To Physical Computing | |||
| Section 3 Files | 00:00:00 | ||
| Programming The LED | 00:00:00 | ||
| Real Time Demonstration – LED Blinking Duration Control | 00:00:00 | ||
| Section 4 - Reading Human Physical Input | |||
| Section 4 Files | 00:00:00 | ||
| Reading Physical Input From A Push Button | 00:00:00 | ||
| Understanding The Code – Physical Input | 00:00:00 | ||
| Real Time Demonstration – Physical Input | 00:00:00 | ||
| Section 5 - Arduino IDE And LCD Programming | |||
| Section 5 Files | 00:00:00 | ||
| Getting Started With Arduino IDE | 00:00:00 | ||
| Generating Animated Patterns On LCD | 00:00:00 | ||
| Programming The LCD | 00:00:00 | ||
| Real Time Demonstration – Pattern Generation On LCD | 00:00:00 | ||
| Section 6 - NodeMCU Web Server | |||
| Section 6 Files | 00:00:00 | ||
| Introduction To Web Server | 00:00:00 | ||
| Understanding The Web Server Code | 00:00:00 | ||
| Real Time Demonstration – Web Server In Action | 00:00:00 | ||
| Section 7 - Hardware Components And Quiz | |||
| Specific Links Of The Hardware Components | 00:00:00 | ||
| Hardware | 00:00:00 | ||


